Plush Toy Embroidery vs Printing: How to Choose the Right Decoration Method
Embroidery and printing do more than create different surface finishes. They translate artwork into a physical detail that must remain readable after fabric is cut, sewn, curved and stuffed. The right method depends on the artwork, pile length, detail size, colour complexity, intended visual effect and the consistency required across the finished product. A buyer should therefore evaluate decoration together with fabric, pattern placement and sample scale rather than choose a method from a screen image alone.
01
Quick comparison: plush toy embroidery vs printing
Embroidery is typically chosen for defined, tactile details made from thread. Printing is typically chosen when artwork needs flat colour coverage, fine graphic information or tonal variation. Neither method is automatically more professional or suitable for every plush. The comparison below is a starting point; the selected fabric and a physical sample should confirm the decision.
Best for
Embroidery
Defined shapes, outlines, logos and simple facial features
Printing
Gradients, illustrations, many colours and fine graphic detail
Visual texture
Embroidery
Raised thread with a tactile, dimensional finish
Printing
Flat artwork that follows the fabric surface
Fine detail
Embroidery
Clear when stitch paths and scale remain practical
Printing
Can preserve fine lines when the fabric and print method support them
Gradients
Embroidery
Limited; thread changes create stepped colour areas
Printing
Often more suitable for shading and continuous tonal transitions
Durability
Embroidery
Often robust, but dense stitching and exposed threads still need review
Printing
Depends on the printing method, fabric, care conditions and adhesion or dye behaviour
Fabric limitations
Embroidery
Pile can hide stitches; density can stiffen small panels
Printing
Texture, stretch, colour and pile can reduce definition or affect colour
Small facial features
Embroidery
Useful for clean eyes, brows and mouths at a workable scale
Printing
Useful for tiny lines, blush and illustration-style facial detail
Logos and text
Embroidery
Strong for simplified marks and readable lettering
Printing
Useful for complex marks, fine text or multicolour graphics
Production complexity
Embroidery
Affected by stitch count, positions, thread changes and backing
Printing
Affected by artwork setup, method, panels, registration and material compatibility
Typical use cases
Embroidery
Character faces, simple logos, badges and outlined markings
Printing
Printed face panels, costume graphics, gradients and complex surface artwork
02
What embroidery looks like on plush toys
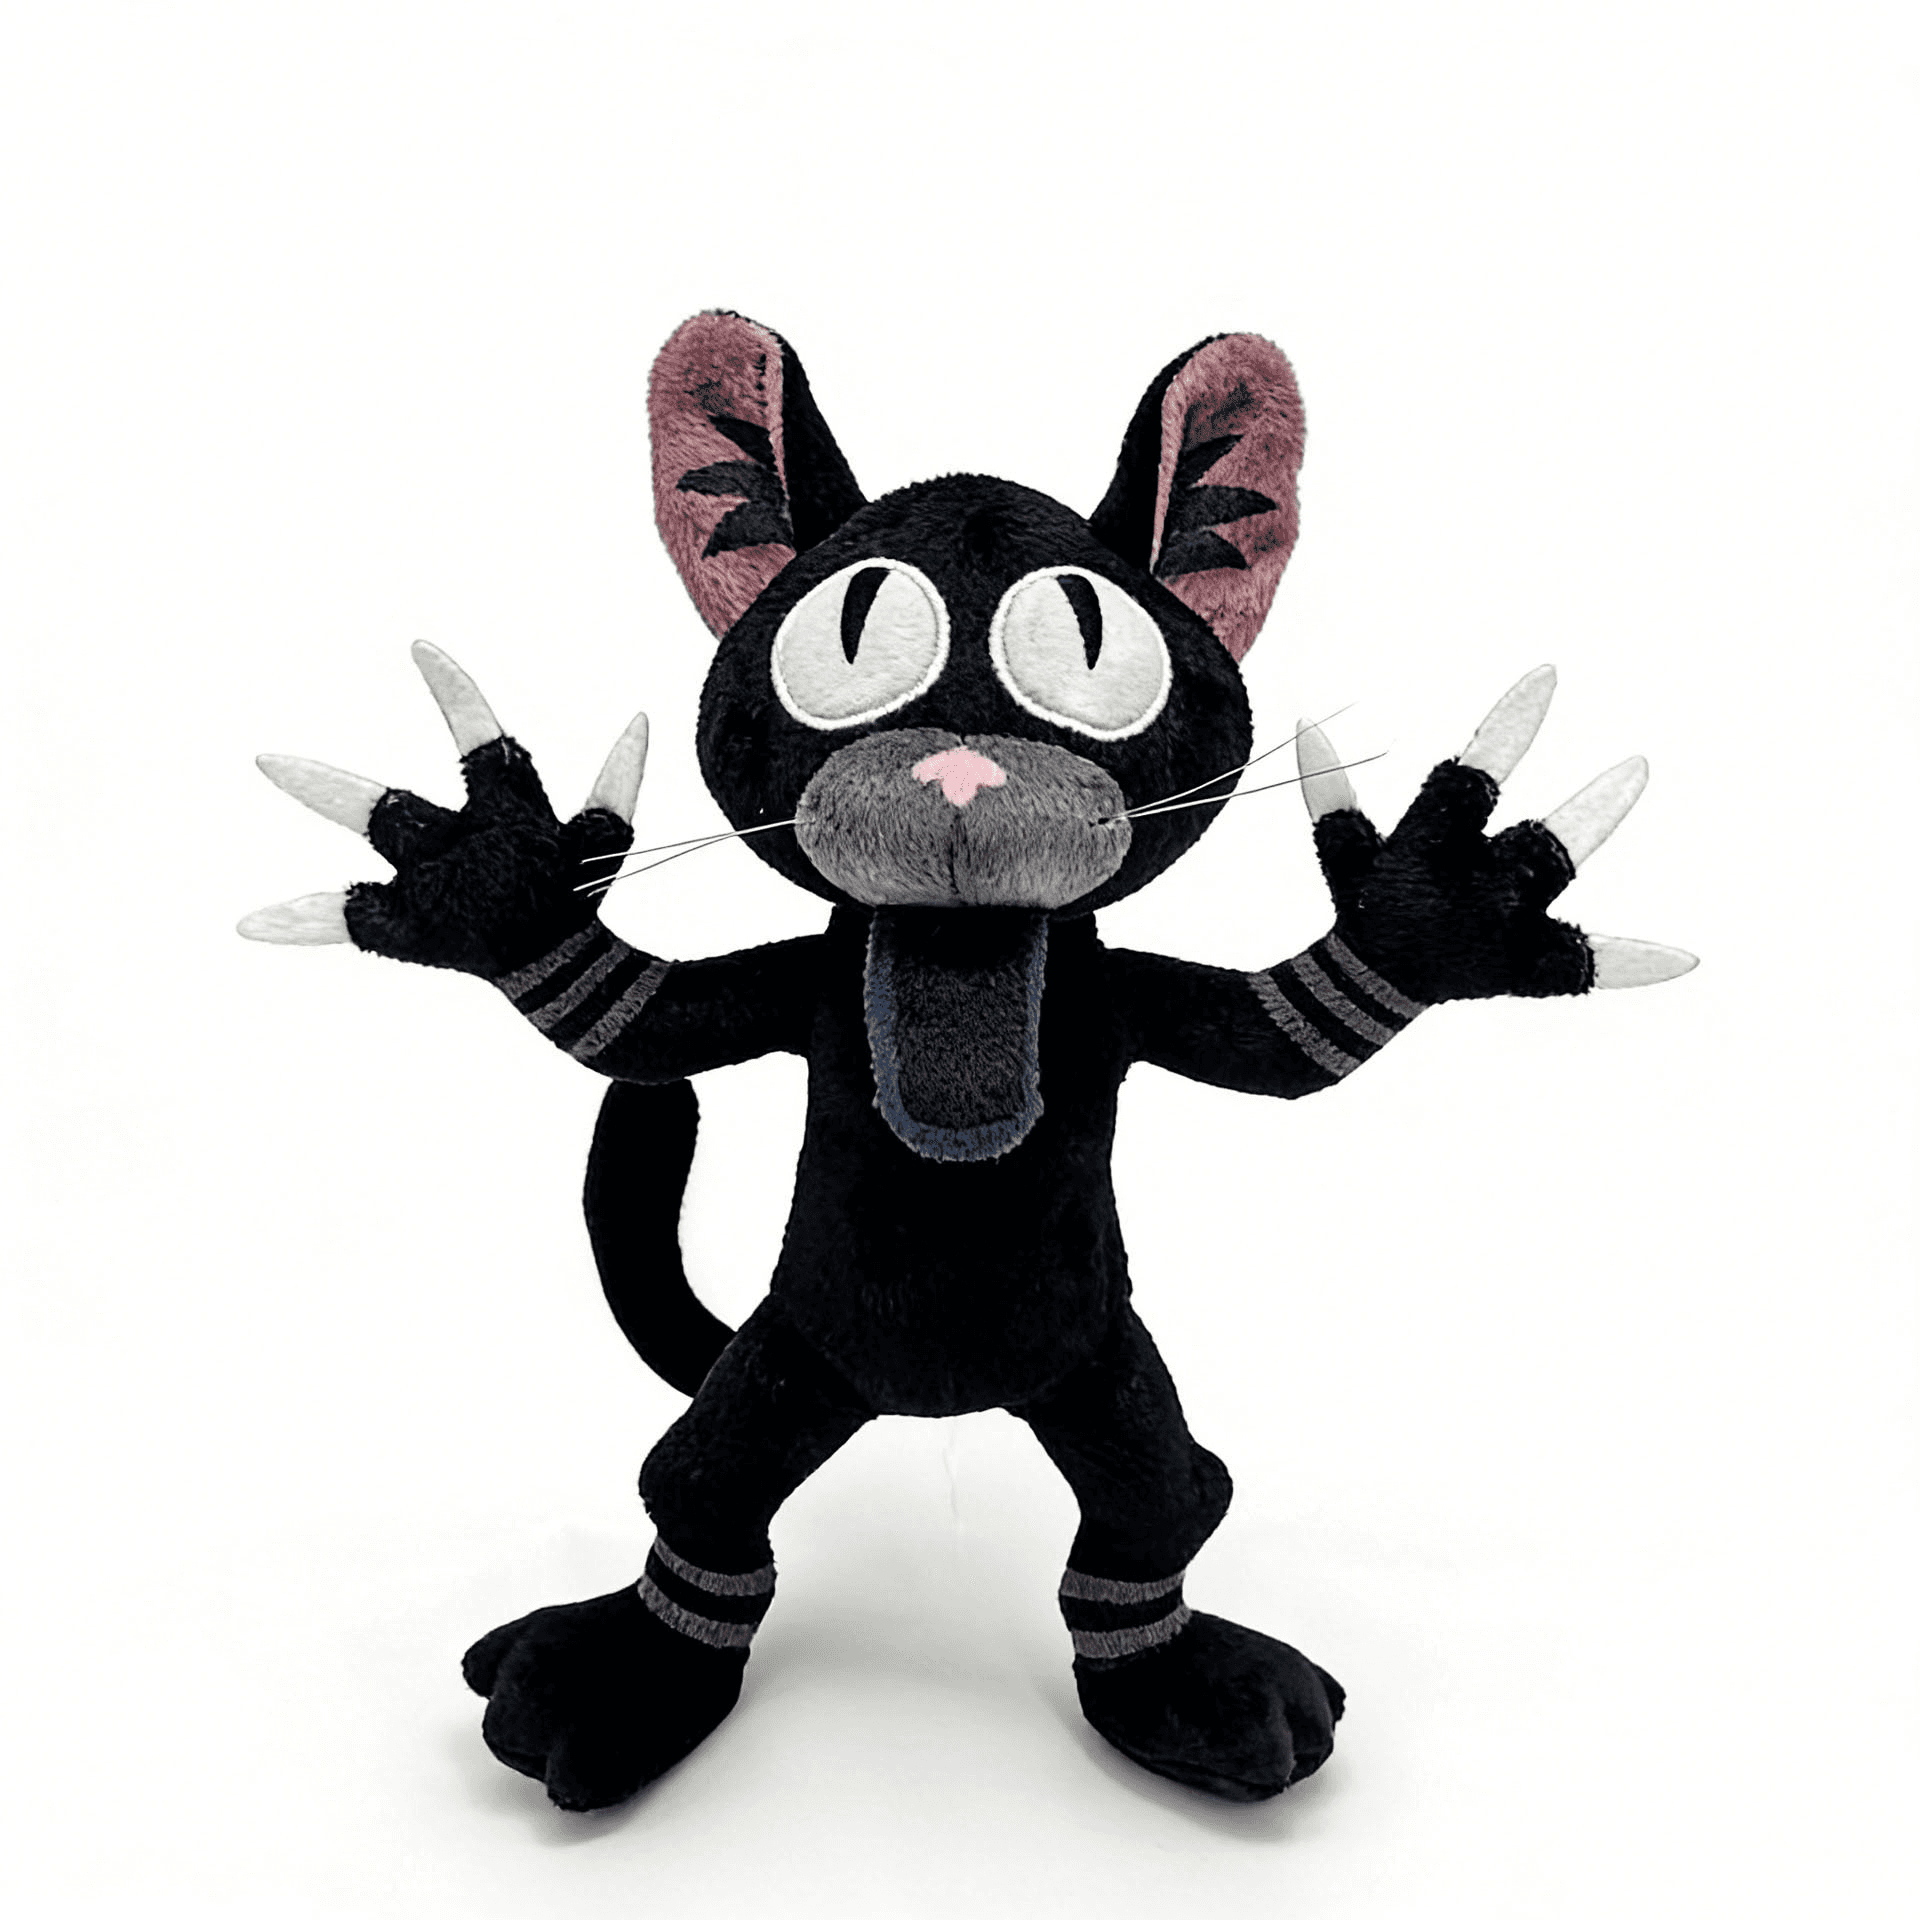
Embroidery builds an image from thread placed into a fabric panel before final assembly. It creates a slightly raised surface, visible stitch direction and a defined edge. These qualities can help eyes, mouths, eyebrows, simplified logos and short text remain clear, especially on short-pile fabrics where the thread is not buried by surrounding fibres.
The artwork still has to be translated into practical stitch paths. Very small gaps can close, thin lines can merge and tight corners can lose definition when reduced to plush scale. Stitch density must support coverage without making the panel unnecessarily rigid. On a small face, a heavily filled embroidered area can change how the fabric bends and how the expression sits after stuffing.
Pile length also matters. Embroidery that looks clear on a flat swatch may become partially hidden on longer-pile plush. A developer may recommend shorter pile in the decoration zone, a separate face panel, simplified lines, applique beneath the embroidery or a different method. Thread colour, backing, placement and the distance from seam allowances should all be reviewed on the assembled sample.
- Tactile thread texture and defined outlines
- Suitable for simplified faces, logos and readable text
- Stitch density should match the panel size and fabric
- Long pile can cover fine stitches or reduce contrast
03
What printing looks like on plush toys
Printing places colour or graphic information onto a fabric surface without building the same raised thread texture. It can reproduce gradients, blush, shading, illustration-style artwork, complex colour combinations and fine graphic details that would become bulky or simplified in embroidery. The visual result is flatter and can feel closer to the original two-dimensional artwork.
There is no single universal plush-printing process. The suitable method depends on fibre content, surface texture, base colour, stretch, artwork coverage, quantity and the required finish. Some projects use printed fabric prepared before cutting. Others print individual panels before assembly so placement can be controlled around the pattern. Printing onto an assembled three-dimensional plush introduces different positioning and surface challenges and should not be assumed practical for every design.
A print sample should be evaluated for colour, edge definition, scale, surface feel and behaviour on the selected material. Fabric colour and texture can influence the perceived result, while pile can break up fine lines. Durability also depends on the method, fabric and intended care conditions. Buyers should approve the actual decorated material or prototype rather than rely only on a digital proof.
- Flat artwork appearance with potential for complex colour
- Useful for gradients, shading and illustration-style details
- Printed panels can support controlled placement before assembly
- Colour and durability should be confirmed on the chosen fabric
04
Printed Plush Face vs Embroidered Face: Which Should You Choose?
For a printed plush face versus an embroidered face, start with the features that carry the character's identity. Embroidery is often effective when the eyes need strong outlines, the brows and mouth are simple, and the expression depends on a few defined shapes. Thread adds dimensional texture and can keep a simplified face visually crisp when the scale and fabric are suitable.
Printing is often a better direction when the face includes blush, soft shading, gradients, many small colours or illustration-like lines. These details can be difficult to translate into thread without increasing density, changing proportions or making a small panel feel stiff. A printed face panel can also keep a coordinated graphic style across a series, although placement and colour still require sample approval.
A hybrid construction is common and should be considered deliberately. A plush might use embroidered eye outlines with printed blush, a printed face panel with embroidered highlights, or applique shapes finished with stitched accents. The aim is not to use more processes; it is to assign each visual feature to the method that reproduces it clearly at the target size.
Facial expression should be judged on the stuffed prototype. Curvature, seam tension and filling can change the apparent angle of eyes or the spacing between a mouth and nose. A method that looks accurate on a flat panel can still require scale or placement revisions after assembly.
05
How fabric affects embroidery and printing
Decoration cannot be separated from the fabric underneath it. Surface fibres affect visibility, stretch affects registration and panel shape affects placement after sewing. The same artwork may need different line weight, colour contrast or construction when moved from velboa to minky or from a short-pile face panel to a long-pile body.
Long pile is especially challenging because fibres can cover fine embroidery and interrupt printed artwork. When a character needs a detailed face, a shorter-pile insert or separate printed panel may provide more definition than decorating directly onto the main long-pile fabric. The final choice should consider both the desired hand feel and the importance of the detail.
Short-pile plush and velboa
These smoother surfaces often support defined embroidery and printing because details remain closer to the visible surface. Stretch, colour and weight still need review.
Minky
Minky can provide a soft, smooth face panel, but pile direction and stretch may influence edge definition and placement. Test the intended decoration on the selected quality.
Longer-pile plush
Long fibres can hide small stitches and break up printed lines. Larger features, contrasting panels or simplified artwork may be more reliable than tiny surface details.
Fleece-like surfaces
Fleece can accept several decoration directions, but thickness, stretch and surface texture affect how flat artwork and dense stitching sit on the panel.
06
Embroidery vs printing for different design elements
A single plush may use different methods for different features. Evaluate each element by its visual role, physical size and location rather than applying one decoration rule to the entire product.
Eyes
Embroidery often suits bold eye shapes and clean outlines. Printing can preserve gradients, multiple highlights or very fine illustration detail. Applique may provide a larger base shape with embroidered accents.
Mouths
A simple mouth line is often practical in embroidery if it remains thick enough at the target scale. Printing can suit delicate curves, tonal lips or multiple closely spaced lines.
Eyebrows
Short embroidered brows can provide clear expression, but the stitch direction and placement must be controlled. Printed brows may suit softer or sketch-like artwork.
Blush and shading
Printing is usually the more natural starting direction for soft blush, gradients and shaded areas. Embroidery creates a textured colour block rather than a soft transition.
Logos
Plush logo embroidery works well for simplified marks with adequate line weight. Printing may be more suitable for detailed logos, many colours or artwork that cannot be simplified without losing recognition.
Text
Embroidered text needs enough height, spacing and stroke width to remain readable. Very small text may close up in thread; printing can preserve finer letterforms when the fabric surface supports them.
Complex graphics
Illustrations, costume art and multicolour graphics often favour printing. If tactile emphasis matters, combine a printed graphic with selected embroidered outlines or accents.
Gradients
Printing is generally more suitable for continuous tonal change. Thread can approximate colour steps, but the result will look intentionally stitched rather than smoothly blended.
Tiny accessories and details
Before decorating a very small accessory, check whether the detail will remain visible after sewing and handling. Simplifying, enlarging or moving the feature can be more effective than forcing either method into an impractical area.
07
Cost and production considerations
Embroidery and printing affect cost through different inputs, but neither method is automatically cheaper. Embroidery is influenced by stitch count, covered area, number of positions, thread changes, backing and the time needed to handle each panel. A small outlined face can be straightforward, while dense filled graphics across several pieces can increase setup and make the construction less flexible.
Printing cost depends on the selected method, artwork preparation, print area, colour coverage, fabric, number of printed panels and quantity. A method suited to one polyester fabric may not suit another surface or fibre direction. Multiple characters can also require separate artwork preparation and placement control even when they share the same product pattern.
The decoration quote should be evaluated against the complete plush specification. Size, pattern complexity, material sourcing, accessories, packaging and quantity can have as much influence as the face or logo treatment. The practical question is which method protects the artwork while remaining repeatable within the agreed product construction.
- Embroidery area, stitch count and number of positions
- Thread changes, backing and panel handling
- Printing method, area and artwork preparation
- Number of printed panels and design variants
- Fabric compatibility, quantity and complete product specification
08
How decoration choices can affect custom plush MOQ
Embroidery by itself does not determine a universal minimum order quantity. The workable quantity comes from the complete production plan, including fabric purchasing, colour availability, pattern setup, decoration positions, accessories, packaging and how many designs or colourways divide the order.
Printing can introduce method- or material-specific setup and sourcing requirements. Printed fabric, custom colour preparation or separately printed panels may have minimums that differ from the sewing quantity. A lower finished-product quantity may still leave excess fabric or packaging, while several designs may be easier to plan when they share materials and construction.
Ask which input sets the minimum and whether shared material planning is practical. This gives a more useful answer than assuming embroidery means one MOQ and printing means another.
09
What happens during decoration sampling
Sampling begins with artwork review. The developer identifies the facial features, logos or graphics that need to remain recognizable, then compares decoration methods against the target size and fabric. Material selection and pattern placement should happen before the decoration file is treated as final because panel shape and seam allowances influence scale and position.
The first prototype is reviewed as a three-dimensional object. Check whether the eyes read correctly from the front, whether the mouth remains clear after stuffing, whether printed areas sit evenly and whether embroidery density changes the hand feel. Compare the physical sample with the approved artwork, but allow for intentional adaptations that protect the character at plush scale.
Revisions may adjust stitch density, line weight, print scale, colour, placement or the split between methods. Once the expression and readability are approved, record the decoration artwork, dimensions, position references, material and colour direction in the production specification.
- Artwork review and feature prioritization
- Decoration recommendation and material selection
- First prototype with assembled facial review
- Density, scale, colour and placement revisions
- Approved artwork and production specification
10
Common embroidery and printing mistakes
Most decoration problems come from treating flat artwork as if it will remain flat and full-size on the product. Review these risks before approving the first sample.
- Using fine embroidery on pile that is long enough to hide it
- Trying to reproduce smooth gradients as dense blocks of thread
- Placing printed artwork too close to the seam allowance
- Reducing embroidered text until letters close or merge
- Ignoring how facial expression changes when artwork is scaled
- Approving a digital proof without checking physical size and fabric
- Using inconsistent decoration logic across a coordinated character series
11
A practical decision framework
Use the artwork and product specification to choose a starting direction, then confirm it through sampling. If important features point in different directions, a hybrid construction may be more controlled than forcing the entire design into one process.
Visual explainer
Choose the method by the detail that must survive translation
The most useful decision protects character recognition, fabric compatibility and repeatability at the target size.
01
Choose embroidery if...
The design relies on defined outlines, simple facial shapes, tactile texture, simplified logos or readable text at a workable scale.
02
Choose printing if...
The artwork relies on gradients, blush, many small colours, illustration-style detail or fine graphics that would become bulky in thread.
03
Consider a hybrid if...
Different features need different finishes—for example embroidered eyes with printed blush, or a printed face panel with stitched accents.
Questions buyers ask before starting
Is embroidery better than printing for plush toy faces?
Not universally. Embroidery often suits defined eyes, mouths and brows with a tactile outline. Printing often suits gradients, blush, many small colours and illustration-style details. Fabric, target size and the assembled expression should be evaluated during sampling.
Can plush toys have printed faces?
Yes. A face can be printed on a compatible fabric or panel when the selected method, material and artwork support the required detail. Colour, placement, surface feel and durability should be approved on the actual material and prototype.
Does embroidery make plush toys more expensive?
It depends on stitch count, area, number of positions, thread changes, backing and handling. Printing has its own artwork, method, material and setup costs. Compare both methods within the complete plush specification rather than assuming one is always cheaper.
Which fabric works best for embroidered plush details?
Short-pile, relatively stable surfaces often make fine embroidery easier to see, but there is no single best fabric for every design. Pile, stretch, thickness, colour and panel construction should be tested with the intended stitch density.
Can embroidery and printing be combined on one plush toy?
Yes. Hybrid decoration can assign different features to suitable methods, such as embroidered eye outlines with printed blush or a printed face panel with embroidered highlights. The combination should be planned before final sample approval.
Is printing durable on plush fabric?
Durability depends on the printing method, fibre, surface texture, artwork coverage and intended care conditions. Request a sample on the selected fabric and confirm any product-specific care or testing requirements rather than relying on a universal claim.
What is better for very small character facial details?
Printing may preserve very fine lines or multiple colours, while embroidery may keep a simplified feature clearer and more tactile. At very small scale, enlarging or simplifying the detail can be more reliable than forcing the original artwork into either method.